How to create a Raspberry Pi OS virtual machine under Proxmox
Introduction
Why it is not a good idea and why I did it anyway.
In my previous post I described the process I used to install Proxmox on a Raspberry Pi 4 (RBP 4) with 4GiB of RAM. The whole reason one installs Proxmox is to create Virtual Machines (VM) and containers. There are a number of tutorials on the internet on how to install Debian, Ubuntu, Fedora and other Linux distributions on a VM, but I found scarce information on how to create one using Raspberry Pi OS (RaspOS). In other words, how to have a RBP inside a RBP?
Spoiler alert, it is possible because I did just that, however, RaspOS is an operating system developed to run on a very specific hardware under a very specific condition. It was not meant to be run in a VM. It is much easier and efficient to use Debian, for instance, than RaspOS.
When running VMs on a small hardware such as a RBP 4 or 5, the OS’s footprint and idle processing must be as small as possible. Each VM should have installed exclusively the application it is supposed to run and nothing else. In that sense, having a bare bone installation of Debian or Ubuntu is the way to go. This is not the case with RaspOS, which comes with heavy weight packages installed and most of the time they just stay there taking disk space.
But of course, the main reason one considers installing RaspOS in a VM is to stretch one’s ability of doing stuff with stuff not suited for the stuff one’s doing, such as installing Proxmox on a hardware it is not meant to run on. We choose to do these things and do the other things, not because they are easy, but because they are weird.
Things I assume you already know
As always, this is not meant to be a copy-and-past guide for dummies on how to do something you should not be doing, rather a report written to my future self on how I did those things that are making my hair fall out because I can’t fix them. I based all this instructions on this post by primetechguides So, before you follow along, make sure you tick this items:
- You know how to install and configure RaspOS under normal circumstances.
- You have watched this amazing tutorial on Proxmox by Learn Linux TV
Downloading stuff
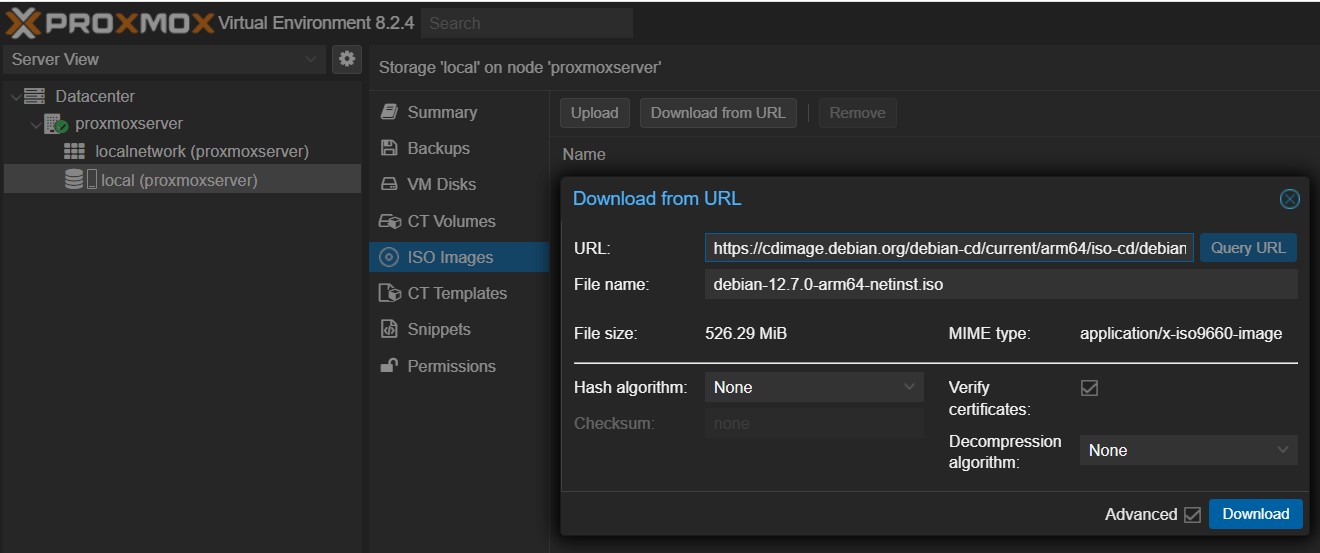
RaspOS is not suited to boot from anything but a RBP computer, so I needed some linux distribution capable of booting to have any chance to load the system. The logical path to follow is to download an ISO image of Debian, as RaspOS is its direct descendant. As you will realize later, this whole process consists in reverting RaspOS back to Debian and then using it. I went to this address and copied the link to the image for netinst at an ARM processor:
https://cdimage.debian.org/debian-cd/current/arm64/iso-cd/debian-12.7.0-arm64-netinst.iso
On the Proxmox web interface I navigated to my local storage, clicked on ISO images, clicked on Download fron URL, past the link on the URL box, clicked on Query URL and on Download. The download started and took about a minute to conclude.
The next and most important thing I needed was an image of RaspOS. I went for the lite version of Bookworm from the official repository. I believe the process should work also with other images, but as I was aiming for a small footprint VM, the smaller, the better. I connected my Proxmox server via SSH, created a directory called RaspOS on the home directory and downloaded the image to it. Those operations could be done on the web interface’s console tab, but I prefer SSH. The lettering is clearer to read and I can copy and paste commands as well.
1
2
3
mkdir RaspOS
cd RaspOS
wget https://downloads.raspberrypi.com/raspios_lite_arm64/images/raspios_lite_arm64-2024-07-04/2024-07-04-raspios-bookworm-arm64-lite.img.xz
Proxmox can not use the image as it is, so I had to prepare it a bit by decompressing it first.
1
xz -d 2024-07-04-raspios-bookworm-arm64-lite.img.xz
I ended up with a file with the .img extension, but in order for Proxmoz to use it, I had to convert it to .qcow2. I also shortened the name for convenience.
1
qemu-img convert -f raw 2024-07-04-raspios-bookworm-arm64-lite.img -O qcow2 RaspOSlite.qcow2
This file was going to be the basis of the disc image of the VM I was creating, but RaspOS needs at least 4GiB to install properly. The file was too short, just 2.7GiB, so I gave this command to enlarge it to 4GiB:
1
qemu-img resize RaspOSlite.qcow2 4G
I found it strange at first glance, but the enlarged image in qcow2 format was smaller than the original img file. That is a good reason to use the qcow2 format.
As the original image was not needed anymore, I deleted it.
1
rm 2024-07-04-raspios-bookworm-arm64-lite.img
Creating the virtual machine
With all files on hand, I created a kind of sketch of a VM. I clicked on Create VM and started to fill the boxes. I chose 200 for the ID of this machine and named it RaspOS.

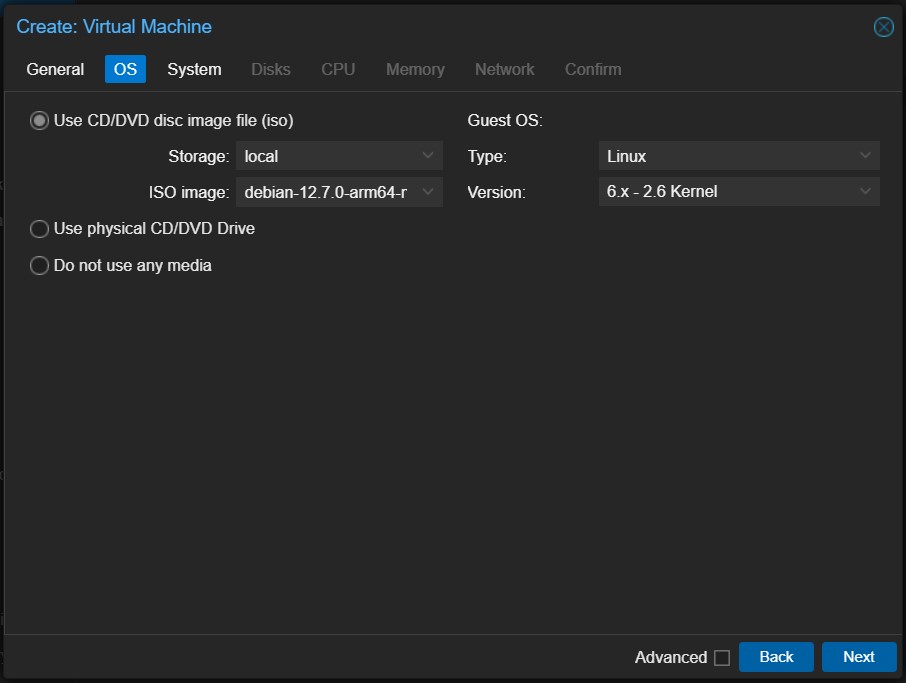
On the OS tab I chose the Debian ISO image from the local storage.
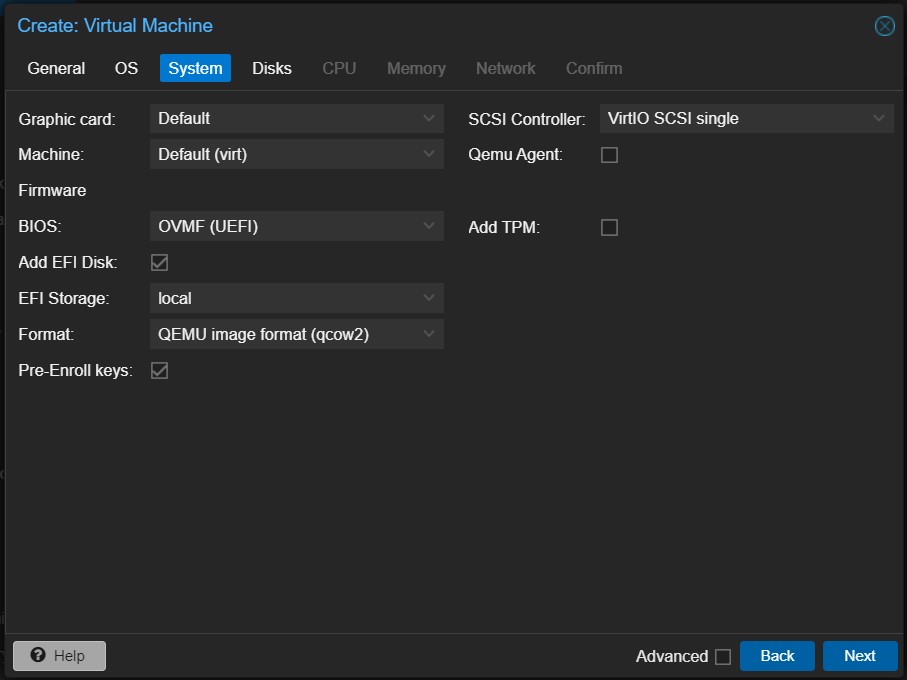
Then I clicked Next and at the System tab I changed the BIOS type to OVMF and assigned EFI storage at the local drive in the QEMU format, leaving everything else at the default setting before clicking Next.
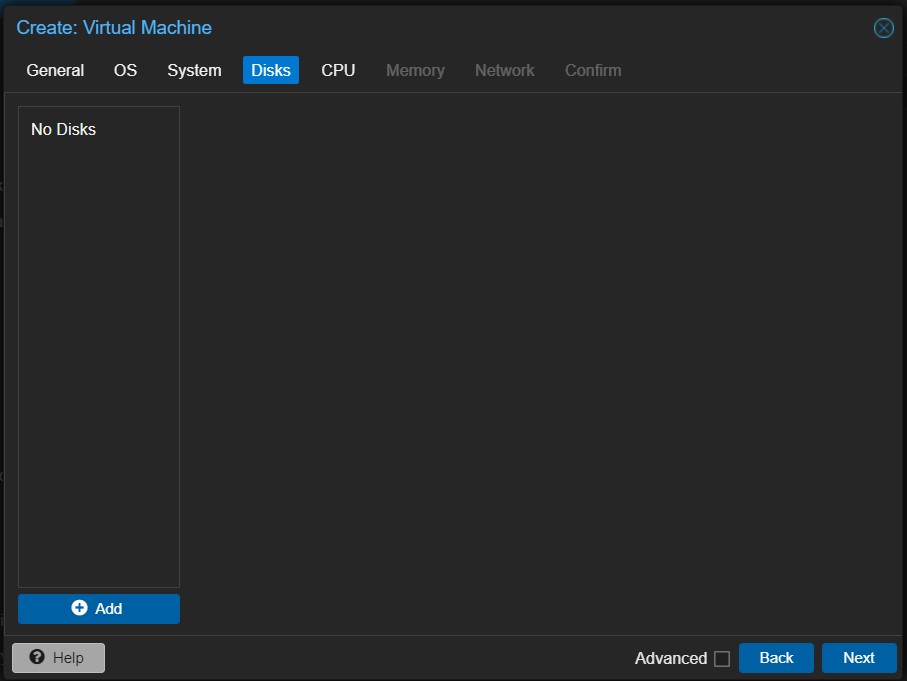
I deleted the disc Proxmox created by clicking on the little trash can icon. The proper disk would be created later at the command line.
Back at the command line, it was time to put in use the RaspOS image I downloaded and modified. To import it to the machine I just created, I gave the command:
1
sudo qm importdisk 200 RaspOSlite.qcow2 local --format qcow2
Two important things to say about the line above are that 200 is the ID of the machine I wanted the disk imported to and the –format parameter to force the qcow2 format. If not specified a format, the command reverts it back to raw, and that makes snapshots unavailable. In order to be able to take snapshots of your machines you need a qcow2 drive.
After a few seconds, the disk was available as Unused Disk 0, so I selected it and clicked on Edit.
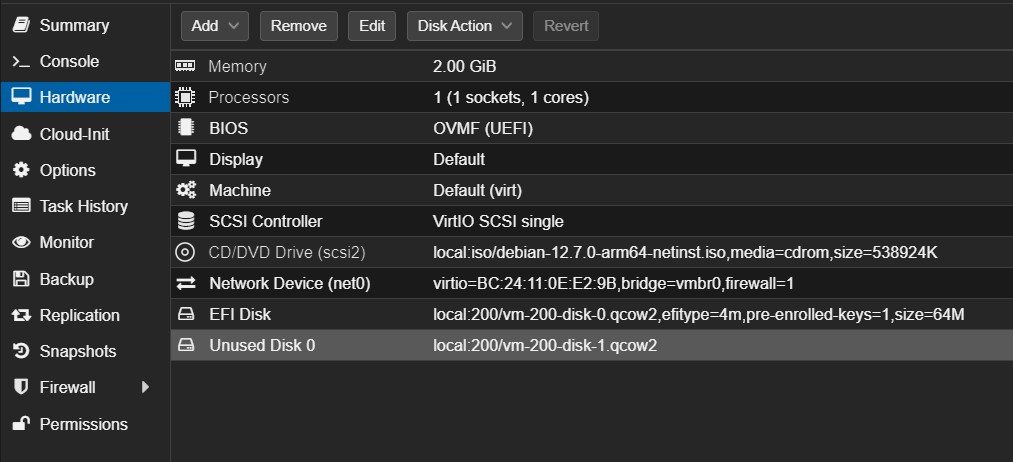
On the Add: Unused Disk box I left all as default except for the Discard option that I set on. I did it because I am running Proxmox on an SSD. You should not enable it on an SD card.
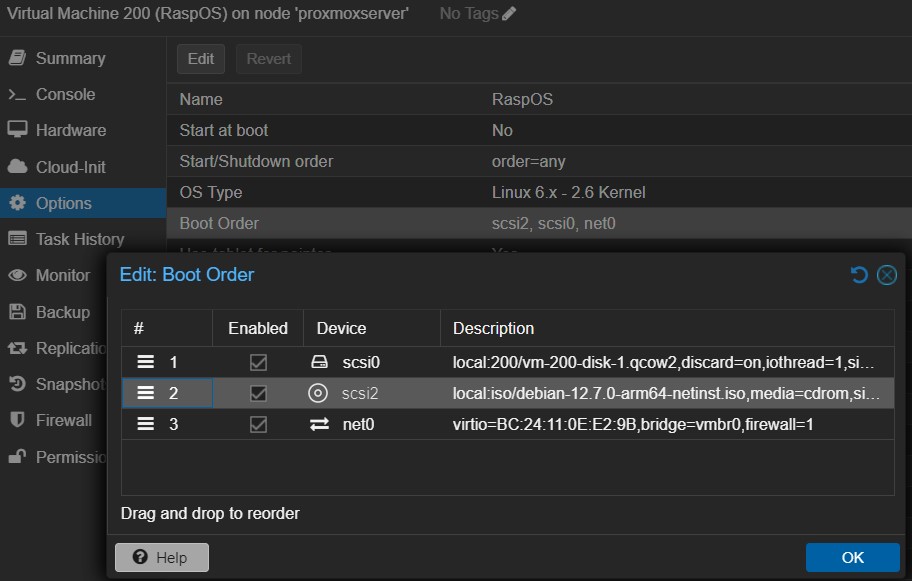
There was just one last thing to do before starting the VM, that was to configure the boot order. So I went to the Options, clicked on Boot Order, moved the SCSI0 drive to the second position, enabled it as a boot drive and clicked OK.
Configuring the VM
First boot
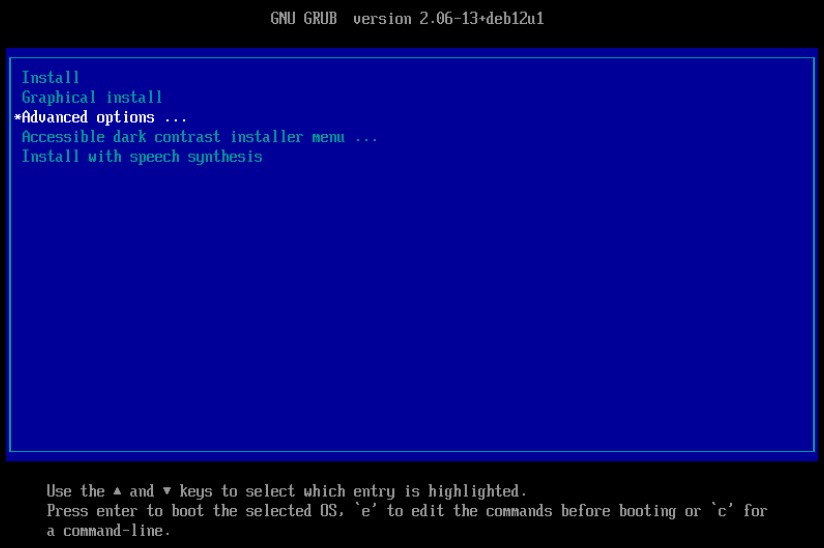
I clicked on the Console tab on Proxmox web interface and started the machine. The boot went on throughout the ISO image of Debian attached as a CD drive. On the first menu, I chose Advanced Options.
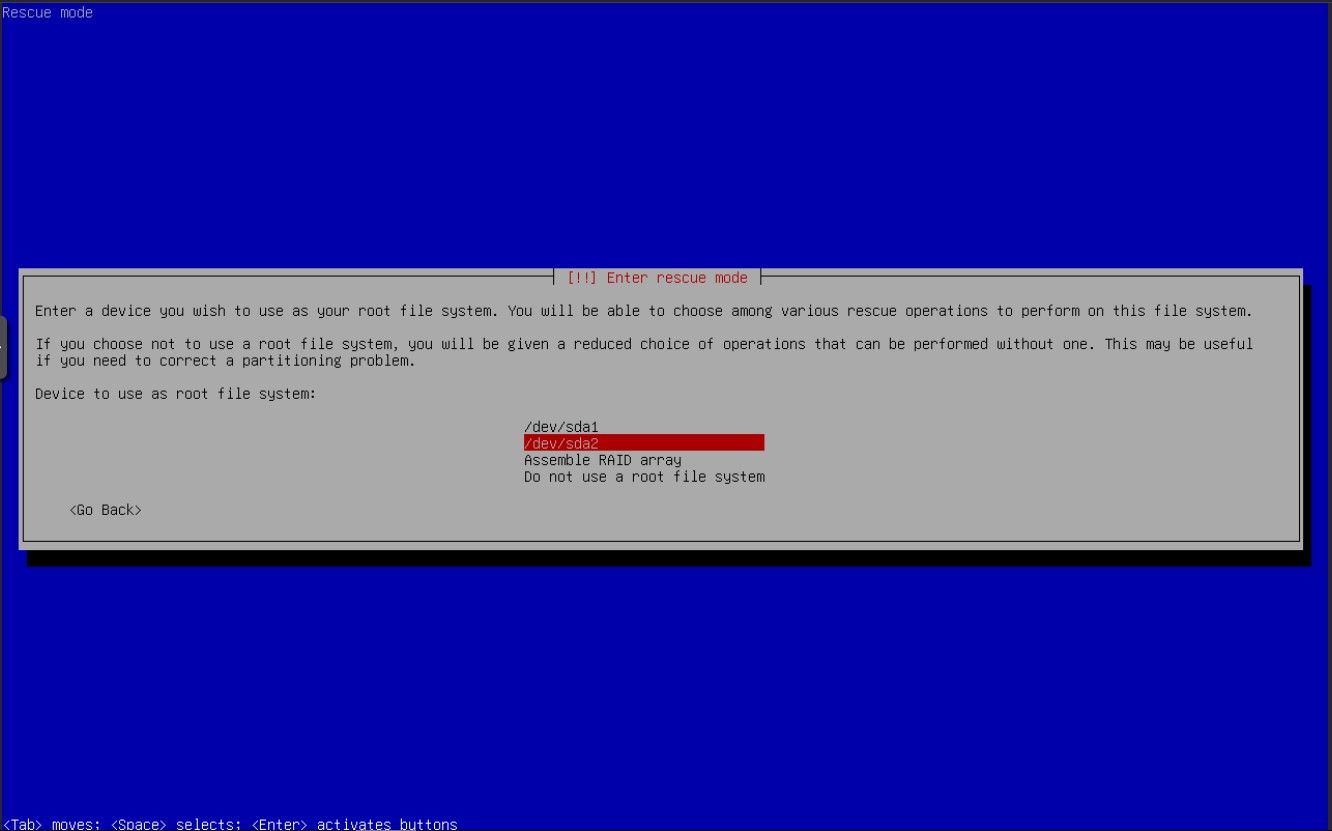
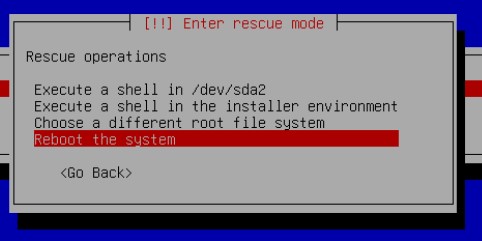
On the second menu I selected Rescue mode and from this point forward it does not really matter what one answers because it is just trying to configure the rescue environment. None of those choices would have permanent results, so I picked all defaults to speed up the process a bit.

I stopped when I reached the Rescue mode screen, where I picked the option /dev/sda2.
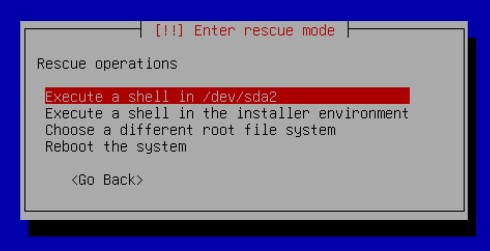
I then selected Execute a shell in /dev/sda2 and run the following commands:
1
raspi-config --expand-rootfs
1
exit
Those were to expand the file system to fill all available space I left for it. Then I chose on the menu to reboot the machine.
Second boot
Again, the VM booted from the ISO image and I went to the whole process again until I got a prompt on /dev/sda2/. On that, I expanded the file system with the command:
1
resize2fs /dev/sda2
On a normal installation of RaspOS, the expansion and resizing of the file system is done automatically by the initialization script, but as I was not able to boot normally into RaspOS, those steps had to be done manually. Next I edited the fstab file.
1
nano /etc/fstab
I then added to the end of the file this line:
1
none /sys/firmware/efi/efivars  efivarfs  defaults
To make sure I did no mistakes on the fstab file, I mounted it with the command:
1
mount -a
If something went wrong, I would receive an error message from the mount command. As it was clean, I followed by testing if the data was there with the commands:
1
2
touch /boot/firmware/ssh
ls /sys/firmware/efi/efivars/
Reverting RaspOS back to normal Linux
Everything ready, it was time for the main trick. As I said at the introduction, RaspOS is a system meant to run on a very specific piece of hardware. The following lines will revert that. First, I did a system update:
1
2
apt update
apt -y full-upgrade
Then I installed GRUB, which is Debian’s boot-loader and boot manager.
1
apt -y install grub-efi-arm64
Following that, I added the linux image to the installation:
1
apt -y install linux-image-arm64
I got some error messages about unsupported kernels, but I ignored them. After that, I got rid of the specific RBP image:
1
apt-get -y purge linux-image.*rpi.*
I followed by creating the GRUB boot loader:
1
2
grub-install --efi-directory=/boot/firmware
update-grub2
All done, I typed exit on the terminal and stopped the VM. I needed to change the boot order to finally load the system properly. On the Options tab and changed the boot order by dragging the SCSI0 drive to the top of the list.
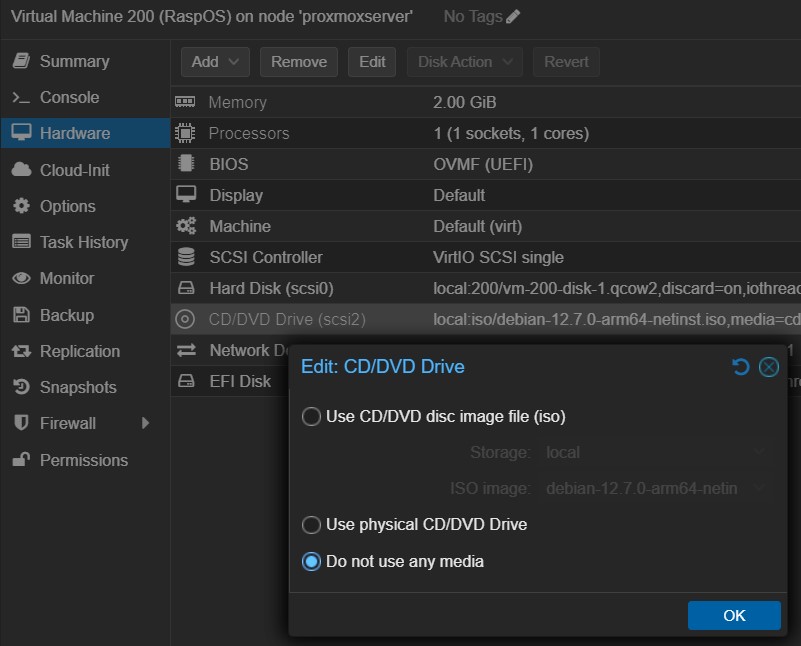
On the Hardware tab, I clicked on the CD drive and chose the No Media option.
Booting into Raspberry Pi OS
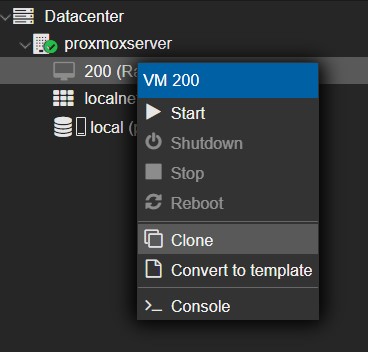
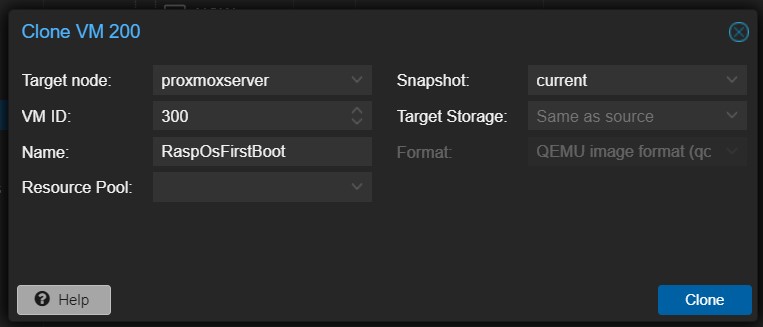
All was set to boot into RaspOS for the first time, but I cloned the machine before starting it to preserve this VM in this particular state, as I knew I would need it for my next post, when I optimize this installation.
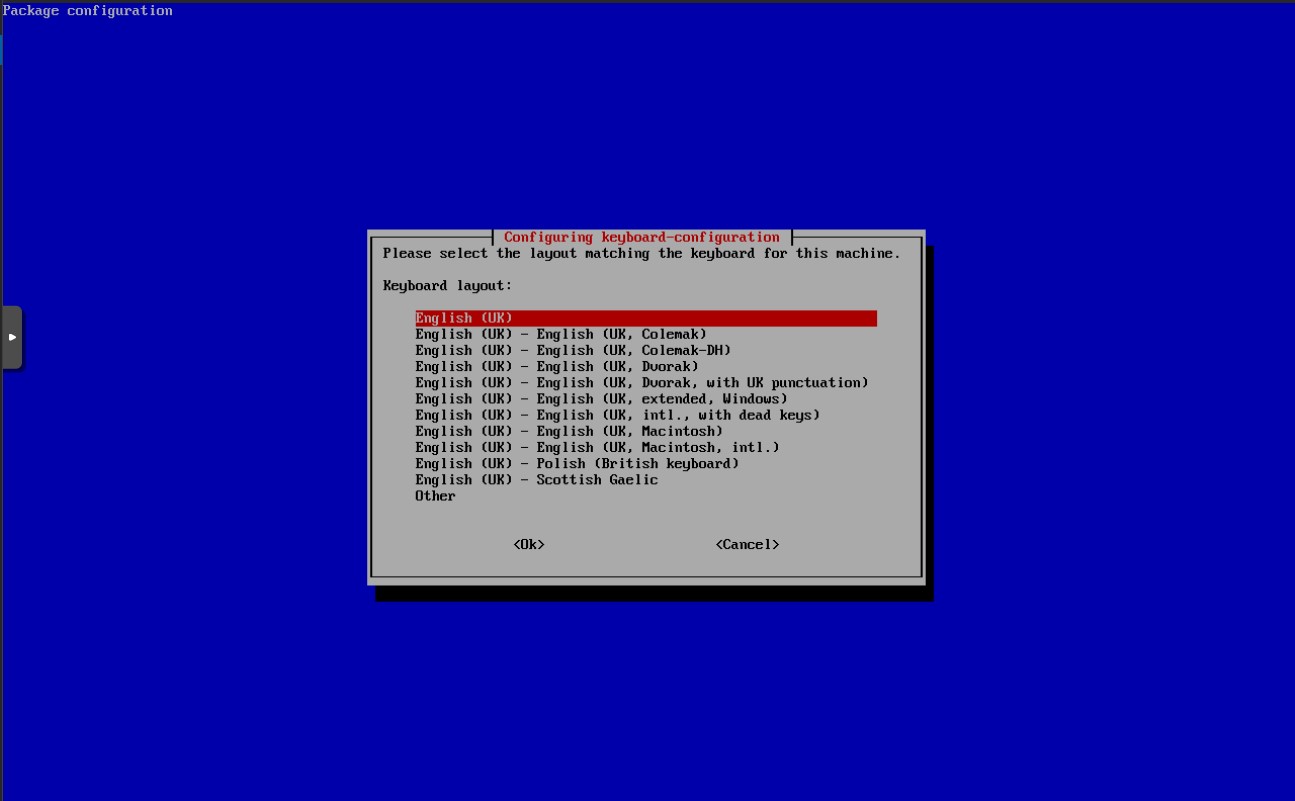
I then started the VM and very soon I was greeted with the first of many configuration screens for RaspOS, that I filled one by one to create my system. From now on it is just a case of do as always.
As soon as I got a prompt, I changes the machine name, enabled SSH and auto login and that was it. In the next post I will use this VM to optimize the one I left cloned.