How to install Proxmox on a Raspberry Pi SBC and put it to work
Introduction
Why?
Having a home server to run applications like ad-blockers and media centers is a must have. The Raspberry Pi (RBP) single board computer (SBC) is a cost effective way for achieving that and, in many cases, it is possible to run several services on the same hardware. Unfortunately, some of those applications run better if left alone on their own hardware or can not run together with some other software for some particular conflict, let us say, the port 80 for example. In cases like that one is forced to have a second or third piece of equipment to accomplish the desired goal.
When we were restricted to the RBP 3 or RBP 3+, it was not a big deal. They were cheap and not particularly powerful, so having several of them running simultaneously did not sound unreasonable. Moreover, having several machines, each one doing just one thing makes maintenance easier.
This scenario changed with the advent of the Raspberry Pi 4 and 5, which could have up to 8GB of RAM, a more capable processor and USB 3 connectivity, also with a not so friendly price tag. Having a bunch of those running idle most of the time in our homelab is a waste. In this new context we must run our applications on containers and virtual machines that reside on this new and much more capable hardware.
Proxmox is a well known and vastly documented software which has this exact function. It is a hypervisor. With it we can create virtual machines and containers to run applications in complete isolation from each other on the same hardware. It is powerful enough to even host itself or other hypervisores, allowing the creation of virtual machines inside virtual machines.
That is the path I decided to follow, but I soon discovered it is not a particularly well lit one. Although knowing it was possible to run Proxmox on a RBP, I struggled to find bits and pieces of information here and there on how to do it, while walking in the darkness and bumping into walls all the time. The knowledge available is sparse and spread out, without a proper body or context. This post is my attempt to clear and illuminate this approach, so those who come after may have a pleasant journey.
Things I assume you already know
If you are reading this post with the intention of replicating what I have done, keep in mind that it is not a copy-and-paste tutorial, rather it is mostly a report I am writing to remind myself how to do this in case I have to do it again. That said, these are the things I will assume you know how to do.
- Create a bootable media for a RBP and make it work.
- Use the terminal window to give commands.
- Use nano editor to change files.
- Set a static IP address for a computer on the DHCP server of your router.
- Use SSH to access your computer remotely.
The Hardware
I used in this guide a RPB 4 with 4GB of RAM as the server basis. It would be better to have used a RPB 5 with 8GB of RAM, or a RPB 4 with at least 8GB of RAM, however this was the hardware I had on hand. In any case, the only thing necessary to later upgrade the setup with a RBP 4 to a RBP 5 is to swap one for the other.
Despite the fact I started the whole process of installation with a SD card, it was not used for long, being replaced by a SSD drive straight away. Using a SSD as the main storage media for the server is mandatory; a SD card would not last long nor provide the necessary speed needed. Among several choices of external hard drives, I decided to use a 240GB SATA SSD with an USB to SATA adaptor. I got this particular model in the picture below.

In summary, the hardware I was dealing with was:
- Raspberry Pi 4 with 4GB of RAM
- SD card large enough to hold a full installation of Raspberry Pi OS
- SATA SSD with 240GB of capacity
- USB 3.0 to SATA adaptor
Preparing the backgroung
Creating a bootable media
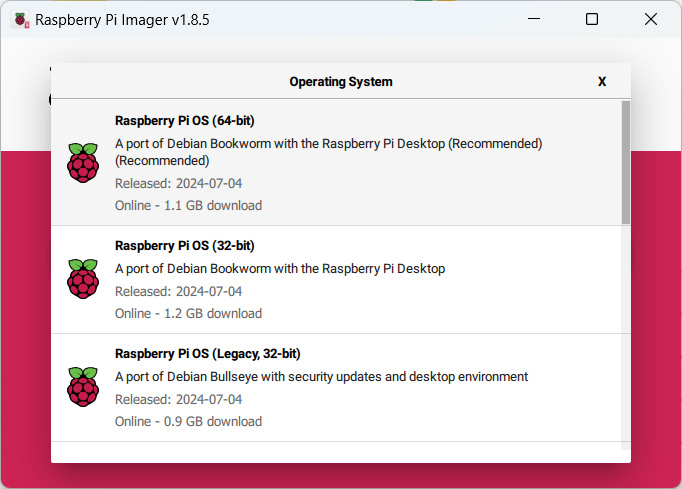
That was straightforward. I just open the latest version of Raspberry Pi Imager on my computer and copy the full version image with a desktop into the SD card.
If you already have an installed version of Raspberry Pi OS, this step is superfluous. I just did it because all my RBPs are in use for other purposes and I don’t want to disturb them by installing software I am going to use just once. Moreover, there is one problem with the RBP 4 drivers that must be addressed before I install anything on the SSH. As I already solved it on my other RBPs, I needed this fresh installation to show it.
Once I had the GUI in front of me, I started the process by opening a terminal window and typing the ubiquitous:
1
sudo apt update && sudo apt -y full-upgrade
The next thing I did was to install GParted and mtools. This was needed to create and rearrange some partitions on the SSD and made it more suitable for the hyperviser.
1
sudo apt -y install gparted mtools
Solving some driver issues
The next thing to do was to write an image to the SSD and at this point my struggle began. I have installed Raspberry Pi OS on hard drives and SSDs several times using pen drives, external hard discs or SATA discs with USB adaptors with zero issues. However, I could not create a bootable SSD from my RBP 4. It failed each time at different moments. Sometimes during the writing, some during the verification, going well just ones only to fail during boot. I tried a number of times, some using the USB 3 ports and some the USB 2 ports. I also tried a different adaptor with no success. It worked for a time, but randomly failed, crashing the system in the process.
The most strange thing about this problem is that the very same SSD with the SATA to USB adaptor worked fine on a RBP 3B and RBP 3B+. I did the complete process of installing the system using a RPB 3B+ and it was a breeze. I was about to conclude that my RBP 4 had some manufacturing defect when I found this article while researching another problem.
If I attached the SSD to a RBP 3 and run the command:
1
lsusb -t
I had the following result:

The SSD was identified as a mass storage device and the usb-storage driver was attached to it. So far, so good. That is the expected behavior. On the other hand, if I gave the same command to the RBP 4 the result was different.

Now the driver was uas. The SSD is identified as a mass storage device and the ‘usb-storage’ driver is attached to it. So far, so good. That is the expected behavior. On the other hand, if I gave the same command to the RBP 4 the result was different.
I am convinced that it is a hardware related problem or something with the USB bus driver of the RBP 4 and 5. The same SD card inserted on a RBP 3 gives the correct driver. Fortunately, the solution was quite easy. I just had to tell the RBP to use the correct driver, but first I had to discover which one it was. For that I use the command lsusb again, but this time without any parameters.
1
lsusb
And there it was on the first line.

Then I edited the file cmdline.txt to add the command usb-storage.quirks=152d:0578:u at the beginning.
1
sudo nano /boot/firmware/cmdline.txt
My cmdline.txt ended up looking like this:
1
usb-storage.quirks=152d:0578:u console=serial0,115200 console=tty1 root=PARTUUID=85f2652a-02 rootfstype=ext4 fsck.repair=yes rootwait quiet splash plymouth.ignore-serial-consoles cfg80211.ieee80211_regdom=BR
Then I saved the file and rebooted the system.
1
sudo reboot
After the system was loaded again I repeated the lsusb -t command with the expected result.

Be aware that you may not need this correction at all. If you run the command lsusb -t and the driver is usb-storage, just ignore all I have done. If not, replace the ID, that in my case was 152d:0578, with the one you find for your own device, that will be, most likely, a different one.
Creating a bootable SSD
Writing a new image
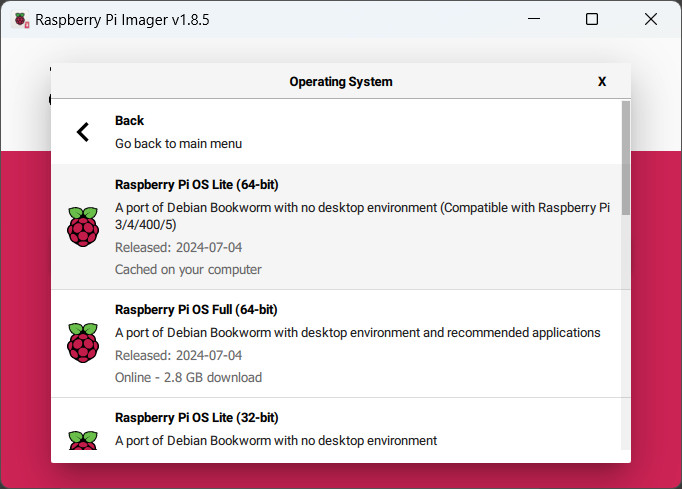
Having now a reliably working RBP 4 I opened again the imager, this time on the Pi itself, and wrote the Lite version of Raspberry Pi OS on the SSD.
Once the process was finished, I opened a terminal window and mounted the boot partition on /mnt.
1
sudo mount /dev/sda1 /mnt
I had to adjust the cmdlint.txt file on the SSD or it would fail at boot due to the wrong driver. This time, in order to edit the file, I typed:
1
sudo nano /mnt/cmdline.txt
And again made the same modification, including usb-storage.quirks=152d:0578:u at the beginning of the file, just like before, then saved and exited. It was time to umount that partition.
1
sudo umount /mnt
Ajusting partition sizes
Then, I went back to the GUI for some deep dive into this new drive. This part of the process is completely optional. If you don’t feel you need, or should, mess around with tools that can potentially wipe all your data, just jump to the next section.
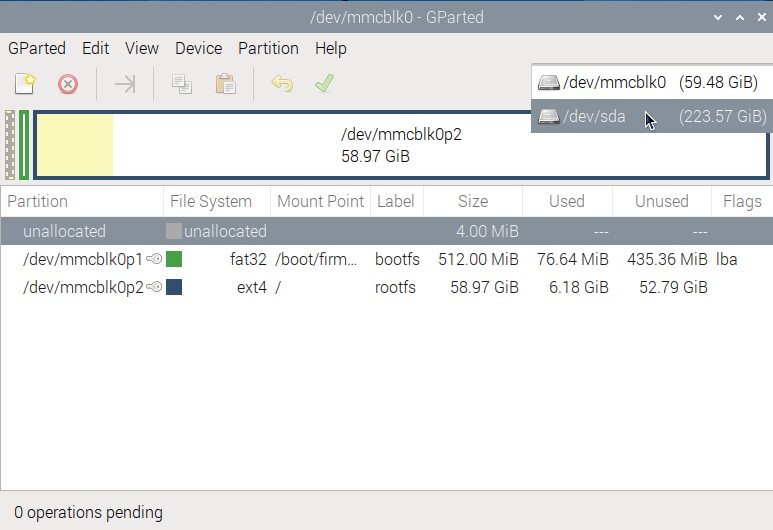
I opened GParted, which I had installed previously, to make some modifications on the structure of the system. GParted asks for the user password to be opened. This is a kind of program that can cause a lot of damage if not used carefully and that is another good reason to create a new SD card with the only objective of creating this SSD. Fist I selected the correct drive I was going to edit, which was /dev/sda.
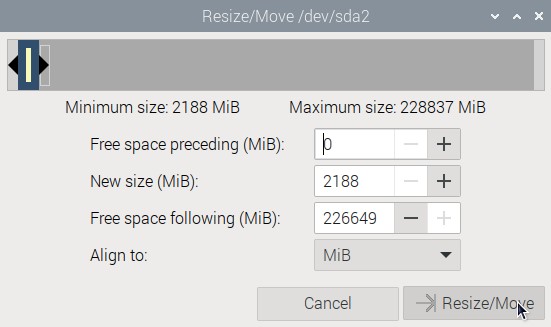
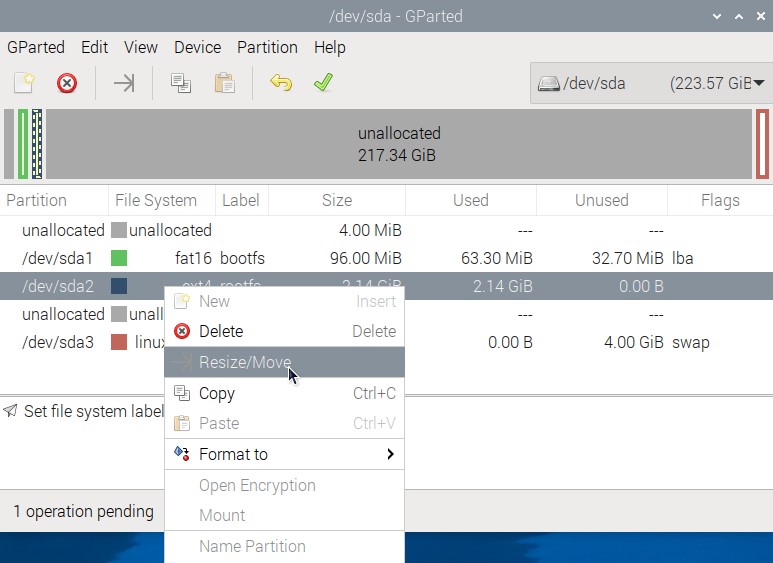
The first partition on the SSD is the boot one. It is 512MiB long but just a fraction of it is used. I am a person from the time when my whole computer had just 640k of RAM and the hard drive was only 30MiB long. The entire operating system with most applications could fit in a floppy disc of just 360k. Having a partition of half a gigabyte to use less than 100MiB of it is offensive to me. So, I adjusted it to a more appropriate size. I right clicked on the partition and chose Resize/Move.


On the new windows that opened I changed the size to 96MiB, which is still an overkill but frees more than 80% of the original space. Next I clicked on Resize/Move. It was time to put to use the space conquered. I right clicked on the second partition and again chose Resize/Move. This time I altered the space before the partition from 416MiB to zero and clicked Resize/Move.
As soon as I clicked Resize/Move I was greeted with this amicable warning.

It was just GParted being silly. I was not moving a boot partition. The boot partition is the one I resized and this one is not a Windows partition. I knew I had nothing to worry about and just clicked OK.
Creating a swap partition
Following that, I focused my attention on the unallocated space at the end of the drive. I right clicked on it and chose New. First I changed the file system to linux-swap. On the New size box I wrote 4096MiB and used the mouse to drag it all the way to the end of the space.
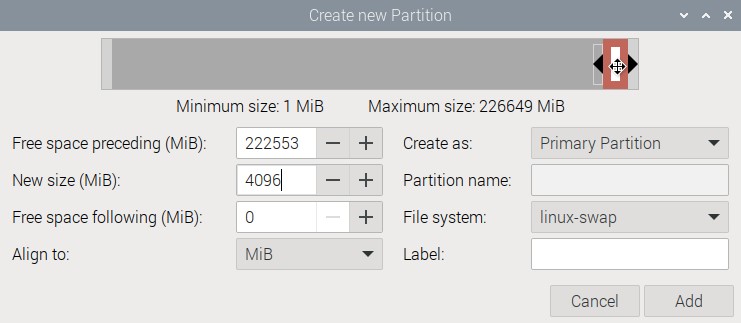
Choosing the size of a swap partition is not an exact science. What I do is to set the size of the partition to the same size of the installed memory. That is where I compromise. Some people say it is too much, some say it is too little. If you think I should use a different amount, feel free to do it your way.
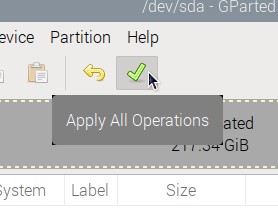
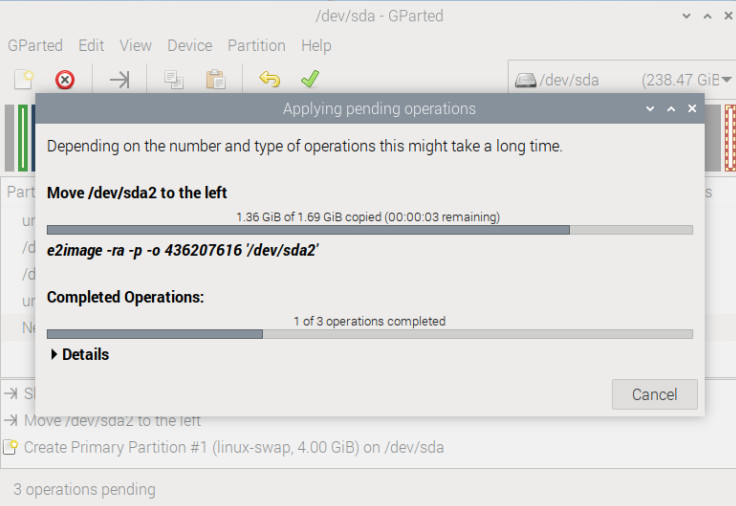
Finely, I clicked on Apply All Operations, which is the little button with a green tick mark on it, to let GParted do its thing.
I was again greeted with another silly message from GParted, being once more overprotective.
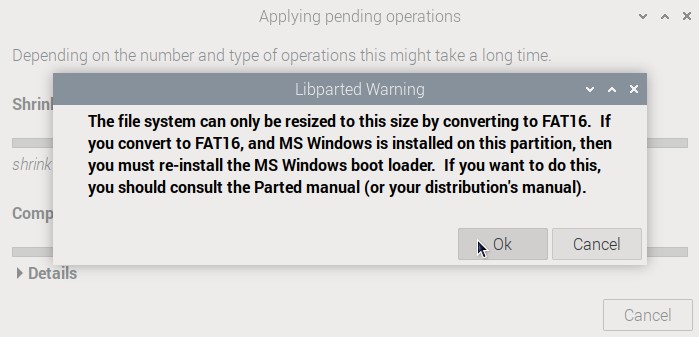
I did not have nor would ever have a Windows system coexisting with Raspberry Pi OS, so this is another warning that was safe to ignore and click OK. The process finally started and soon enough it was concluded.
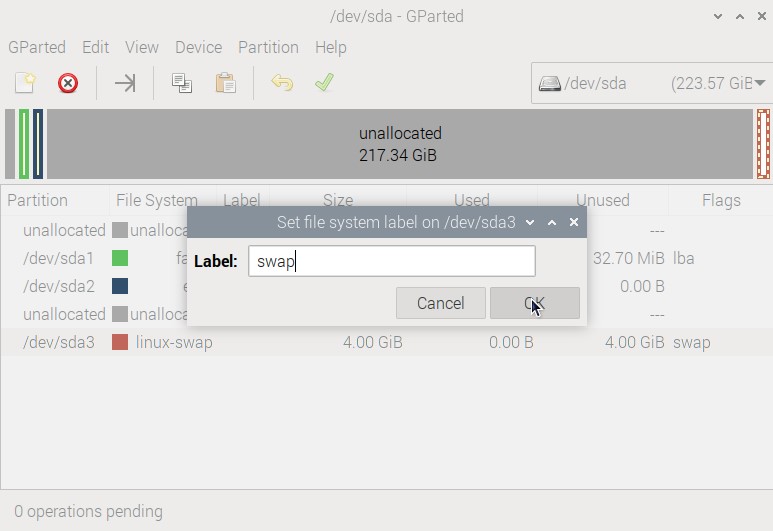
I then right clicked on the new swap partition and changed its label to swap, just because it is nice to give things a proper name.
The very last thing I had to do was to expand the root partition. As it was not anymore the last partition on the disc, because I created a swap partition at the end of it, Raspberry Pi OS would not be able to resize it by itself. But that was an easy task. I just right clicked again on the root partition and chose Resize/Move.
Then I dragged the right end of the partition until it filled all the available space.

At last, I applied all changes again and shot the system down, removed the SD card and powered it again for the first boot from my new drive.
Booting from the SSD
Setting up the swap partition
It took a while, with several reboots and some configuration screens, but soon enough I had the system running. My first move was to put the swap partition to work. That was done by adding a line at the file /etc/fstab.
1
sudo nano /etc/fstab
At the end of the file, I added the following line, replacing XXXXXXXX by my SSD Part Unique Universal Identifier:
1
PARTUUID=XXXXXXXX-03  none       swap    sw     0       0
The file ended up looking like this:
1
2
3
4
5
6
proc            /proc           proc    defaults          0       0
PARTUUID=d7d22d3c-01  /boot/firmware  vfat    defaults          0       2
PARTUUID=d7d22d3c-02  /               ext4    defaults,noatime  0       1
PARTUUID=d7d22d3c-03  none            swap    sw                0       0
# a swapfile is not a swap partition, no line here
#   use  dphys-swapfile swap[on|off]  for that
Then I saved and exited the editor. To put this new swap into operation I gave the command:
1
sudo swapon -a
That was it! In order to check it the partition was operational I run the command:
1
free -hw
Disabling the swap file
As I had 4GiB of swap in a dedicated partition, I had no need for an extra swap file. Even less a tiny one as that which comes built in Raspberry Pi OS. In order to completely disable it, I run this commands:
1
2
3
4
sudo dphys-swapfile swapoff
sudo dphys-swapfile uninstall
sudo update-rc.d dphys-swapfile remove
sudo apt -y purge dphys-swapfile
At this point I had the system in good shape and ready for its first update.
1
sudo apt update && sudo apt -y full-upgrade
I was finally ready to install Proxmox.
Installing Proxmox
But before it…
The package qemu-utils is useful for some operations under Proxmox and is installed with it, but not complete. And after installing Proxmox, this package became property of Proxmox and the user is no longer able to add or remove parts of it. I discovered it the first time I installed Proxmox and later needed some of those utilities. When I tried to add them, I was presented with an error message. So, before I continue, let me install them.
1
sudo apt -y install qemu-utils
Setting up the environment
Now that I had all installed and the machine configured, it was time to go headless. I set my DHCP server to give my RBP 4 a fixed known IP address. This is important to make sure I had no IP conflicts latter on. During the final configuration the IP will be set on the server as a fixed one and reserving it on the DHCP server is my way to avoid problems. Then I continued all operations via SSH, following this guide.
After I logged in, I made sure curl was installed by the command:
1
apt list curl
Mine was installed, as it should in any distribution of Raspberry Pi OS. Next thing I made sure my /etc/hosts file was properly set. I named my machine proxmoxserver and I had to add the IP I configured on the DHCP to the file.
1
sudo nano /etc/hosts
I edited it, adding a reference to proxmoxserver on a new last line, including the version proxmoxserver.lan, that is how my local DNS treats machine naming:
1
2
3
4
5
6
7
127.0.0.1       localhost
::1             localhost ip6-localhost ip6-loopback
ff02::1         ip6-allnodes
ff02::2         ip6-allrouters

127.0.1.1       proxmoxserver
192.168.2.104   proxmoxserver proxmoxserver.lan
If your local DNS, that normally runs on your router, adds a different termination, as .local or other domain, change it accordingly.
Creating a password for the root user
To use Proxmox I need to login as the root user, so I had to configure its password first with the command:
1
sudo passwd root
I typed my password twice and that was done.
Adding the Proxmox Port Repository
Proxmox is not officially supported on the RBP, but there is this port of it on Github that we can use, but first I had to add the keys for the repository with the commands:
1
curl -L https://mirrors.apqa.cn/proxmox/debian/pveport.gpg | sudo tee /usr/share/keyrings/pveport.gpg >/dev/null
Having the keys added, I appended the repository to the sources list:
1
echo "deb [arch=arm64 signed-by=/usr/share/keyrings/pveport.gpg] https://mirrors.apqa.cn/proxmox/debian/pve bookworm port" | sudo tee  /etc/apt/sources.list.d/pveport.list
It was time to update the system with the new repositories:
1
sudo apt update
And then I installed the last piece of software needed, that was ifupdown2, used by Proxmox to handle the network.
1
sudo apt -y install ifupdown2
Once installed ifupdown2, I configured manually the IP adreess to a fixed one by editing the /etc/network/iterfaces file. Once done, it looked like this:
1
2
3
4
5
6
7
8
9
10
11
12
13
auto lo
iface lo inet loopback

auto eth0
iface eth0 inet manual

auto vmbr0
iface vmbr0 inet static
        address 192.168.2.104/22
        gateway 192.168.1.1
        bridge-ports eth0
        bridge-stp off
        bridge-fd 0
When installed, Proxmox is going to manage all network connections, for itself, VMs and containers using ifupdown2 packege. During the tests I have done, I saw it fighting a lot with NetworkManager, so I removed it in order to let Proxmox do its work in peace.
1
2
sudo systemctl stop NetworkManager
sudo systemctl disable networkManager
At this point I rebooted the system to make sure all configurations were working properly.
1
sudo reboot
Finally the install command
It was a long way, but it was close to being finished. Finally I gave the command:
1
sudo apt install -y proxmox-ve postfix open-iscsi pve-edk2-firmware-aarch64
As soon as the command finished, it was now time to configure Proxmox. The first screen came about automatically and I used the arrow keys to choose the last option Local only.

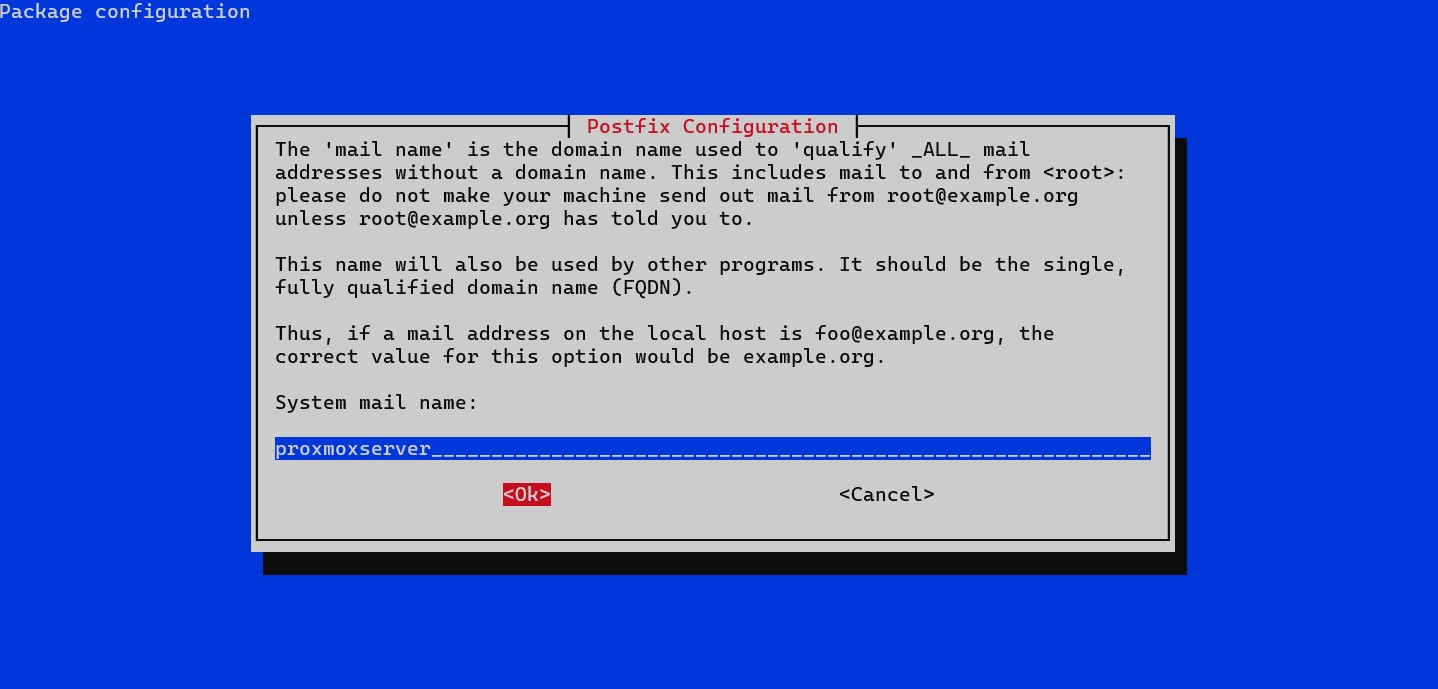
Then it asked me about the domain name for mail. I left the name of my server there, as I have no intention of configuring a mail server on this installation.
Then I had to wait a bit more as the installation finished. It took about 3 minutes before I was greeted with another question:
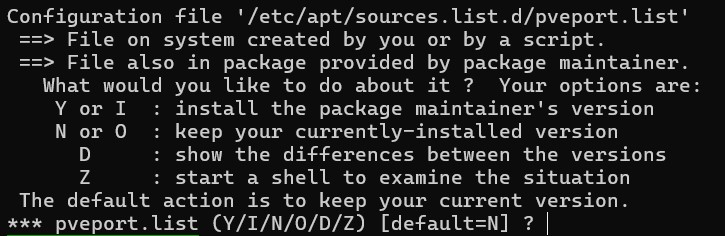
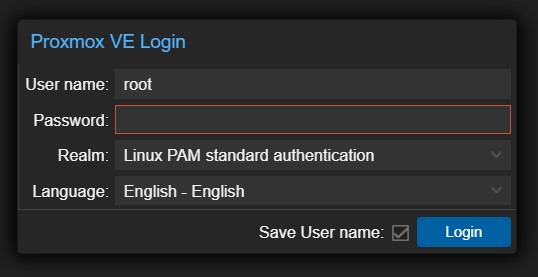
I chose N to keep the file generated by the script. I then opened my browser and navigated to the address https://<IP to my machine>:8006. Of course I had an alert provided by my browser, because the HTTPS certificate Proxmox uses is self signed, and that is a nono for any serious browser. However, this one is safe to ignore as the machine is sitting on my hack and only contains stuff I put there. I have no reason to mistrust my own intentions, and finally I had access to Proxmox login, where I entered the root password I configured before.
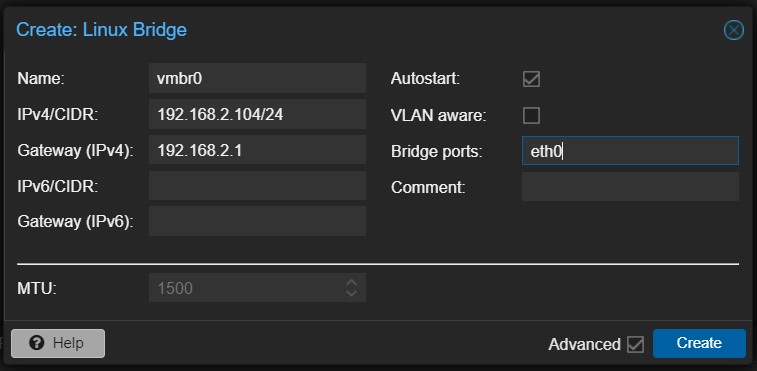
Once logged in, I checked the network connections for my server. Proxmox should find the virtual bridge I created during installation, but if it was not there, I could create it myself. Under the Network tab I clicked Create and then Linux Bridge. Once the box came up, I filled in the IP address of my server and gateway, as well as the bridge port to use, eth0 in my case. Don’t forget to fill in the bridge port, or you may lose access to Proxmox web interface. Do not ask how I know it.
And that was it. In my next post I will tell how I managed to create a virtual machine to run Raspberry Pi OS. In the meantime, I recommend you to watch the excellent tutorial on Proxmox made by Learn Linux TV.